Warning: this post is not about knitting.
I am a person of several hobbies. Knitting is the main one, but I also muck about with resin, beads, charms, acrylic paints, and clay.
I needed to make a quick gift for someone recently and bought some silicone coaster moulds for resin. I half filled the moulds, painted on the resin after it set, then filled the rest. They turned out great!
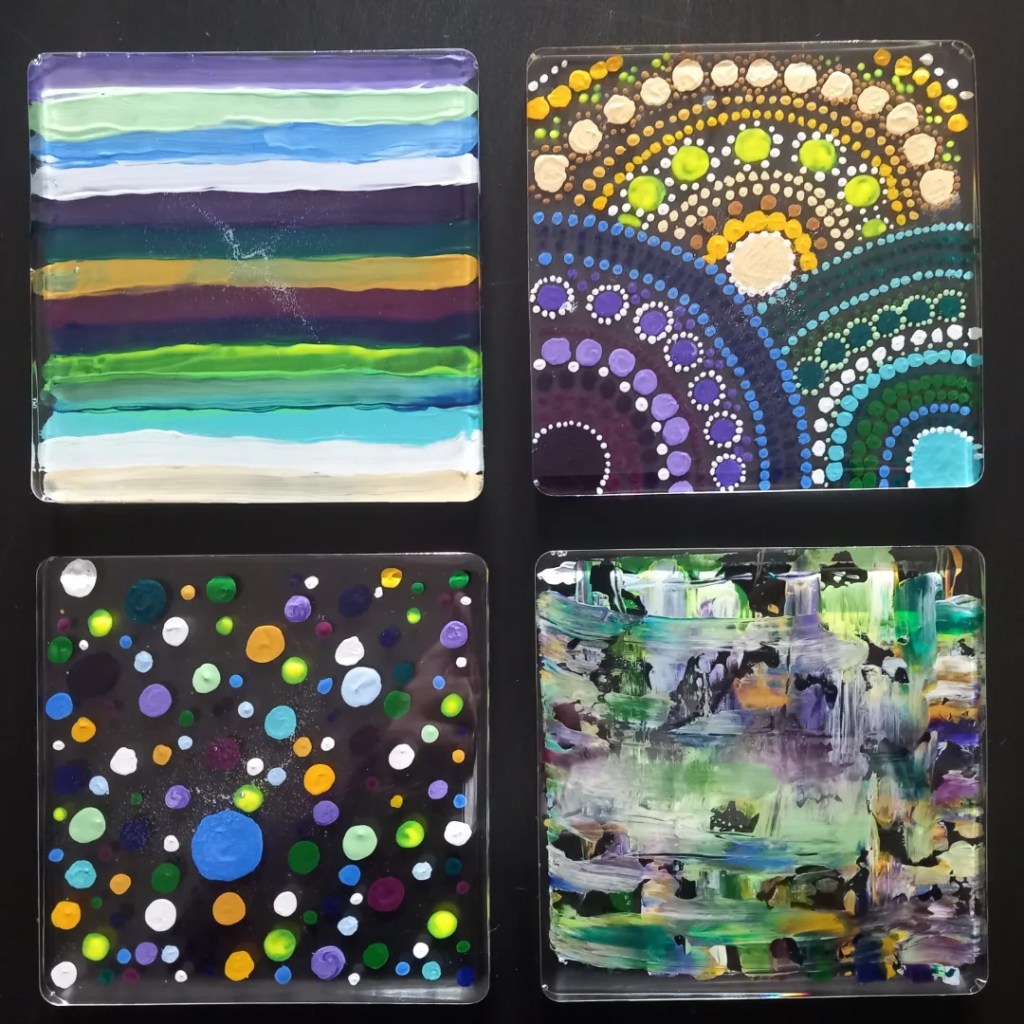
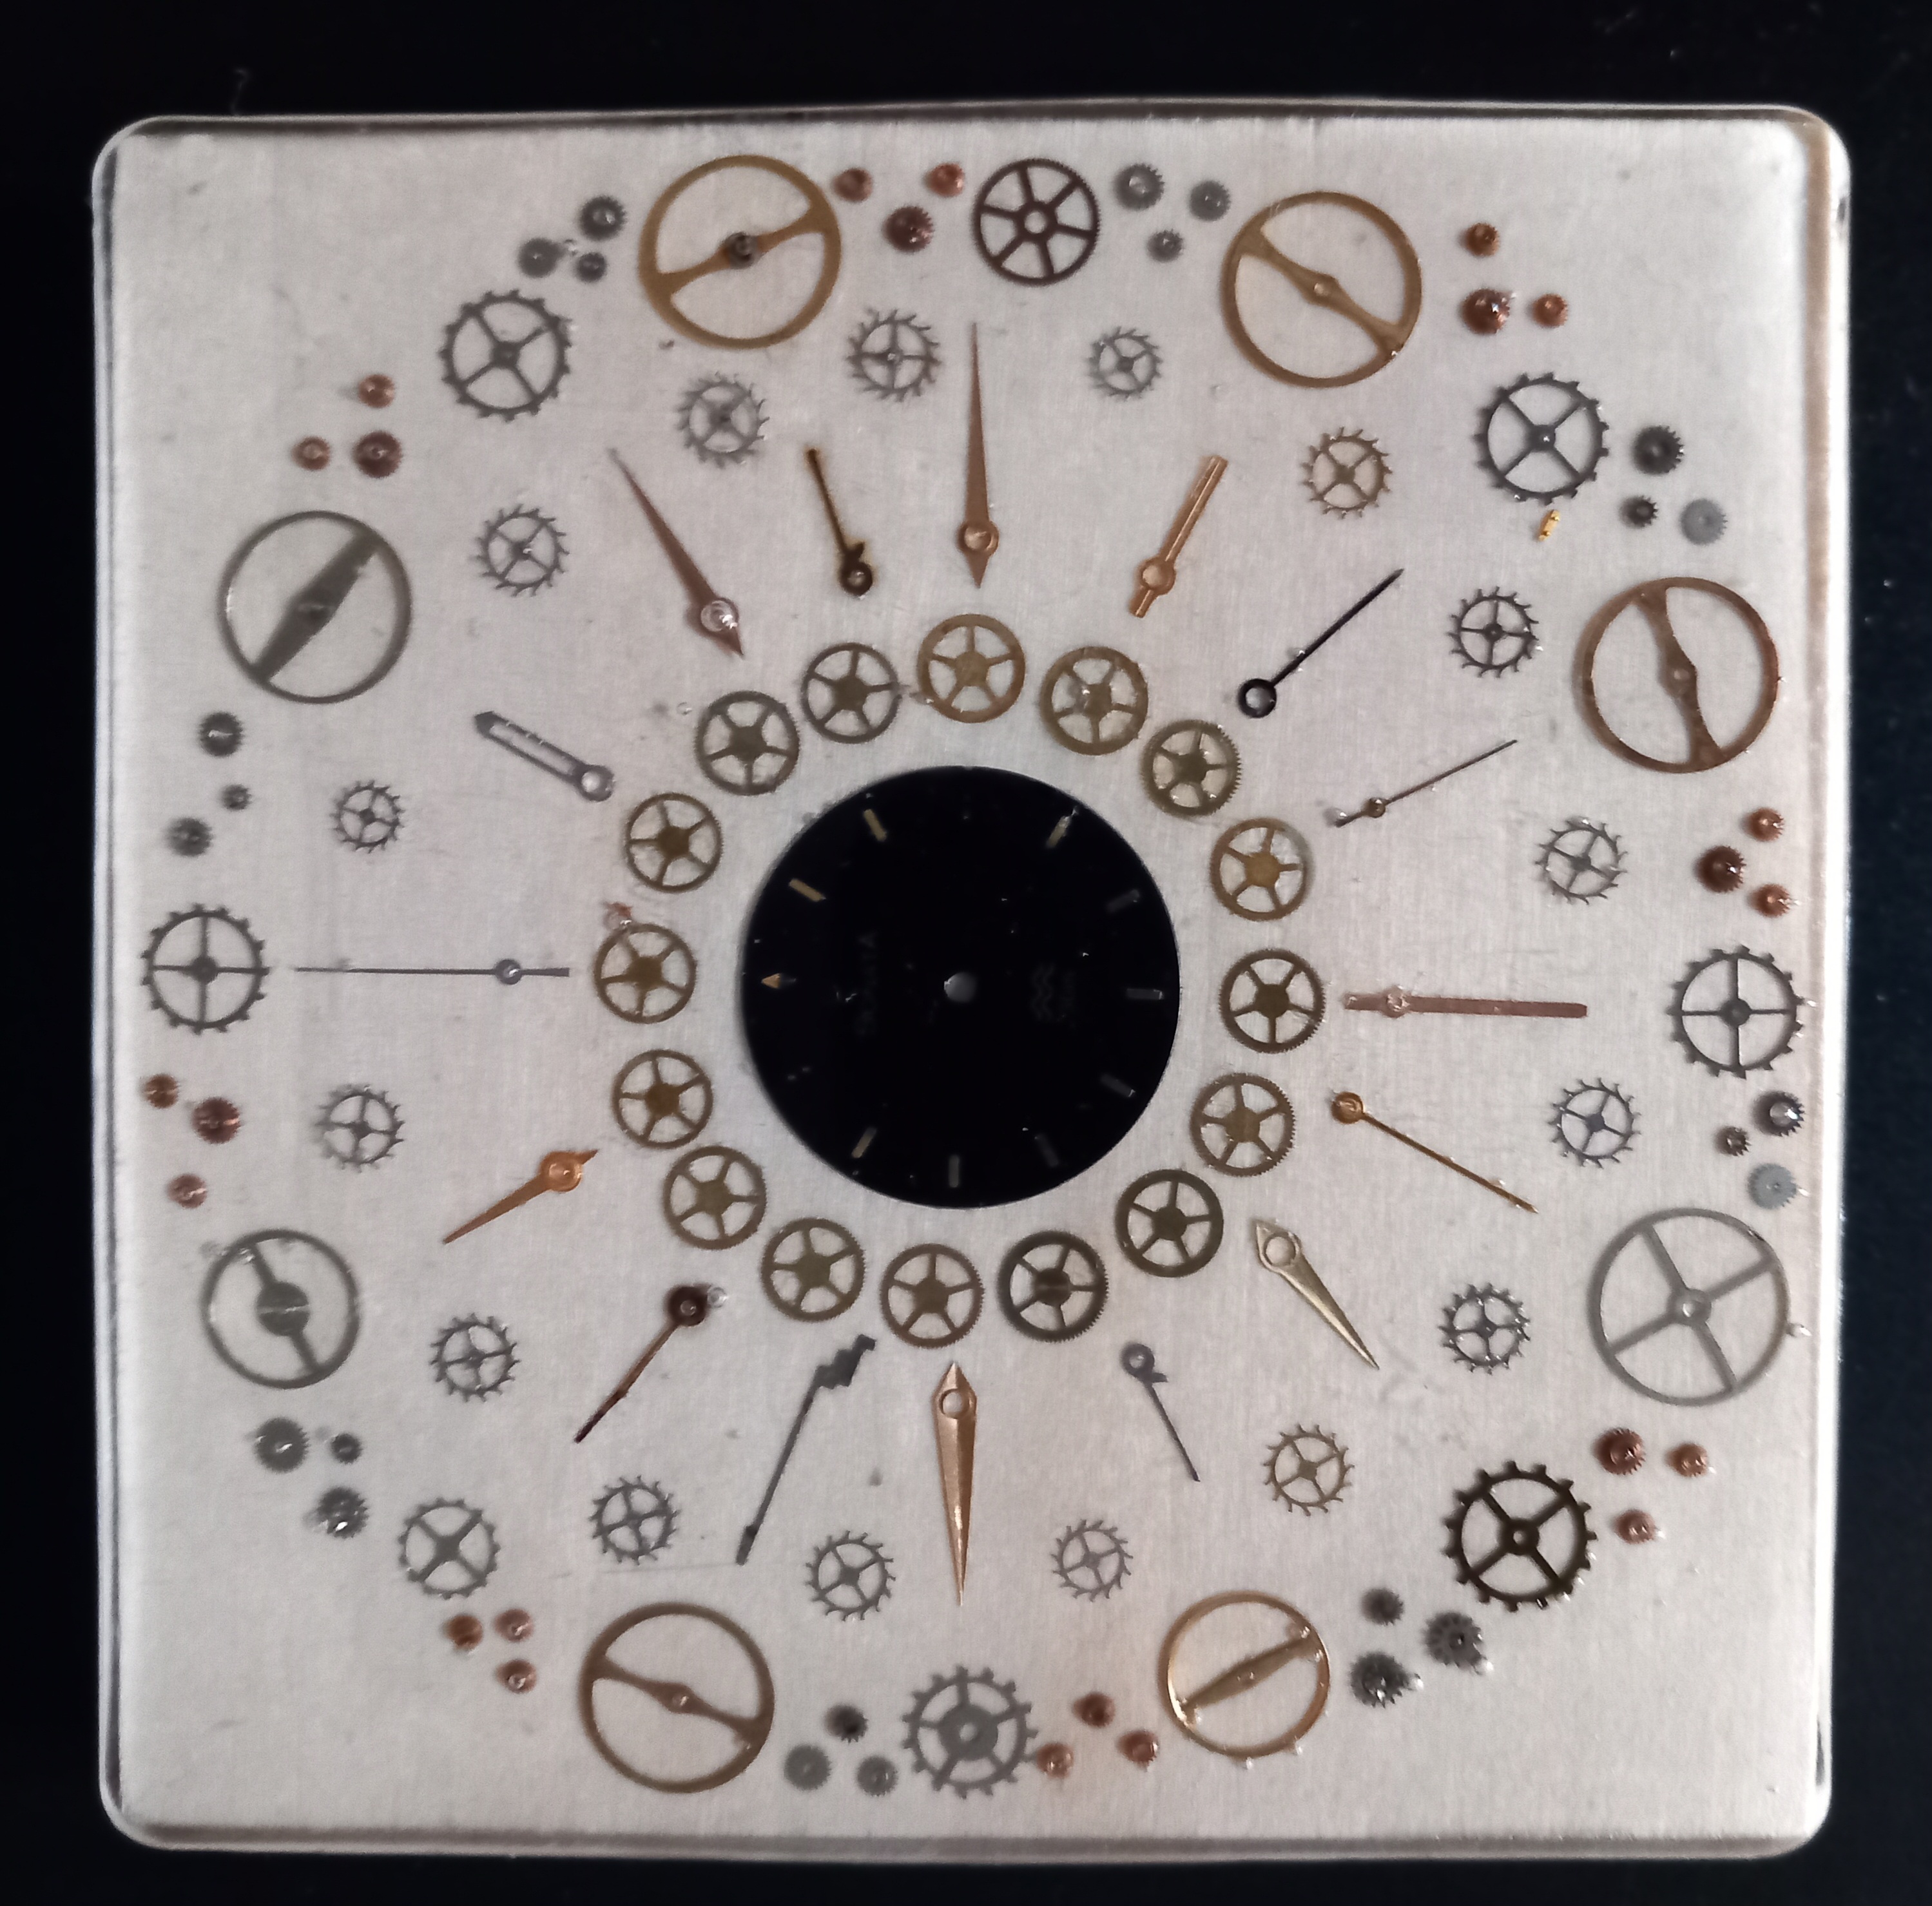
I then somehow found myself imagining creating a mandala, like the coaster top right, with different materials. Beads was one thought, then I guess my mind went to my early jewellery experiments with metal washers and other DIY parts. I thought… clockwork mandala? And an idea was born.
I found a supplier for mixed bags of spare watch parts. You can buy die-cut cogs for arts and crafts but I wanted the real deal. When it arrived, the first step was sorting through them and identifying not only good shapes, but also parts that appeared enough times to make a pattern.
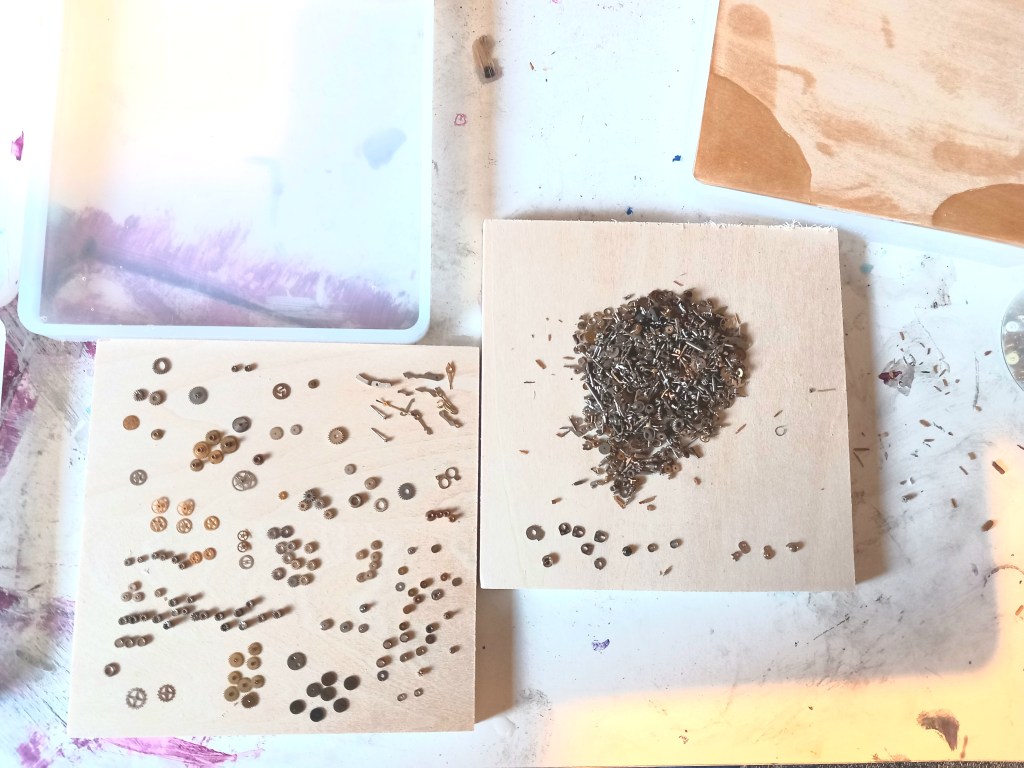
I had ordered plywood squares as a base for these coasters, rather than two layers of resin, and they also served as nice sorting trays! I ended up, after several hours, with three or four full trays of matching parts.
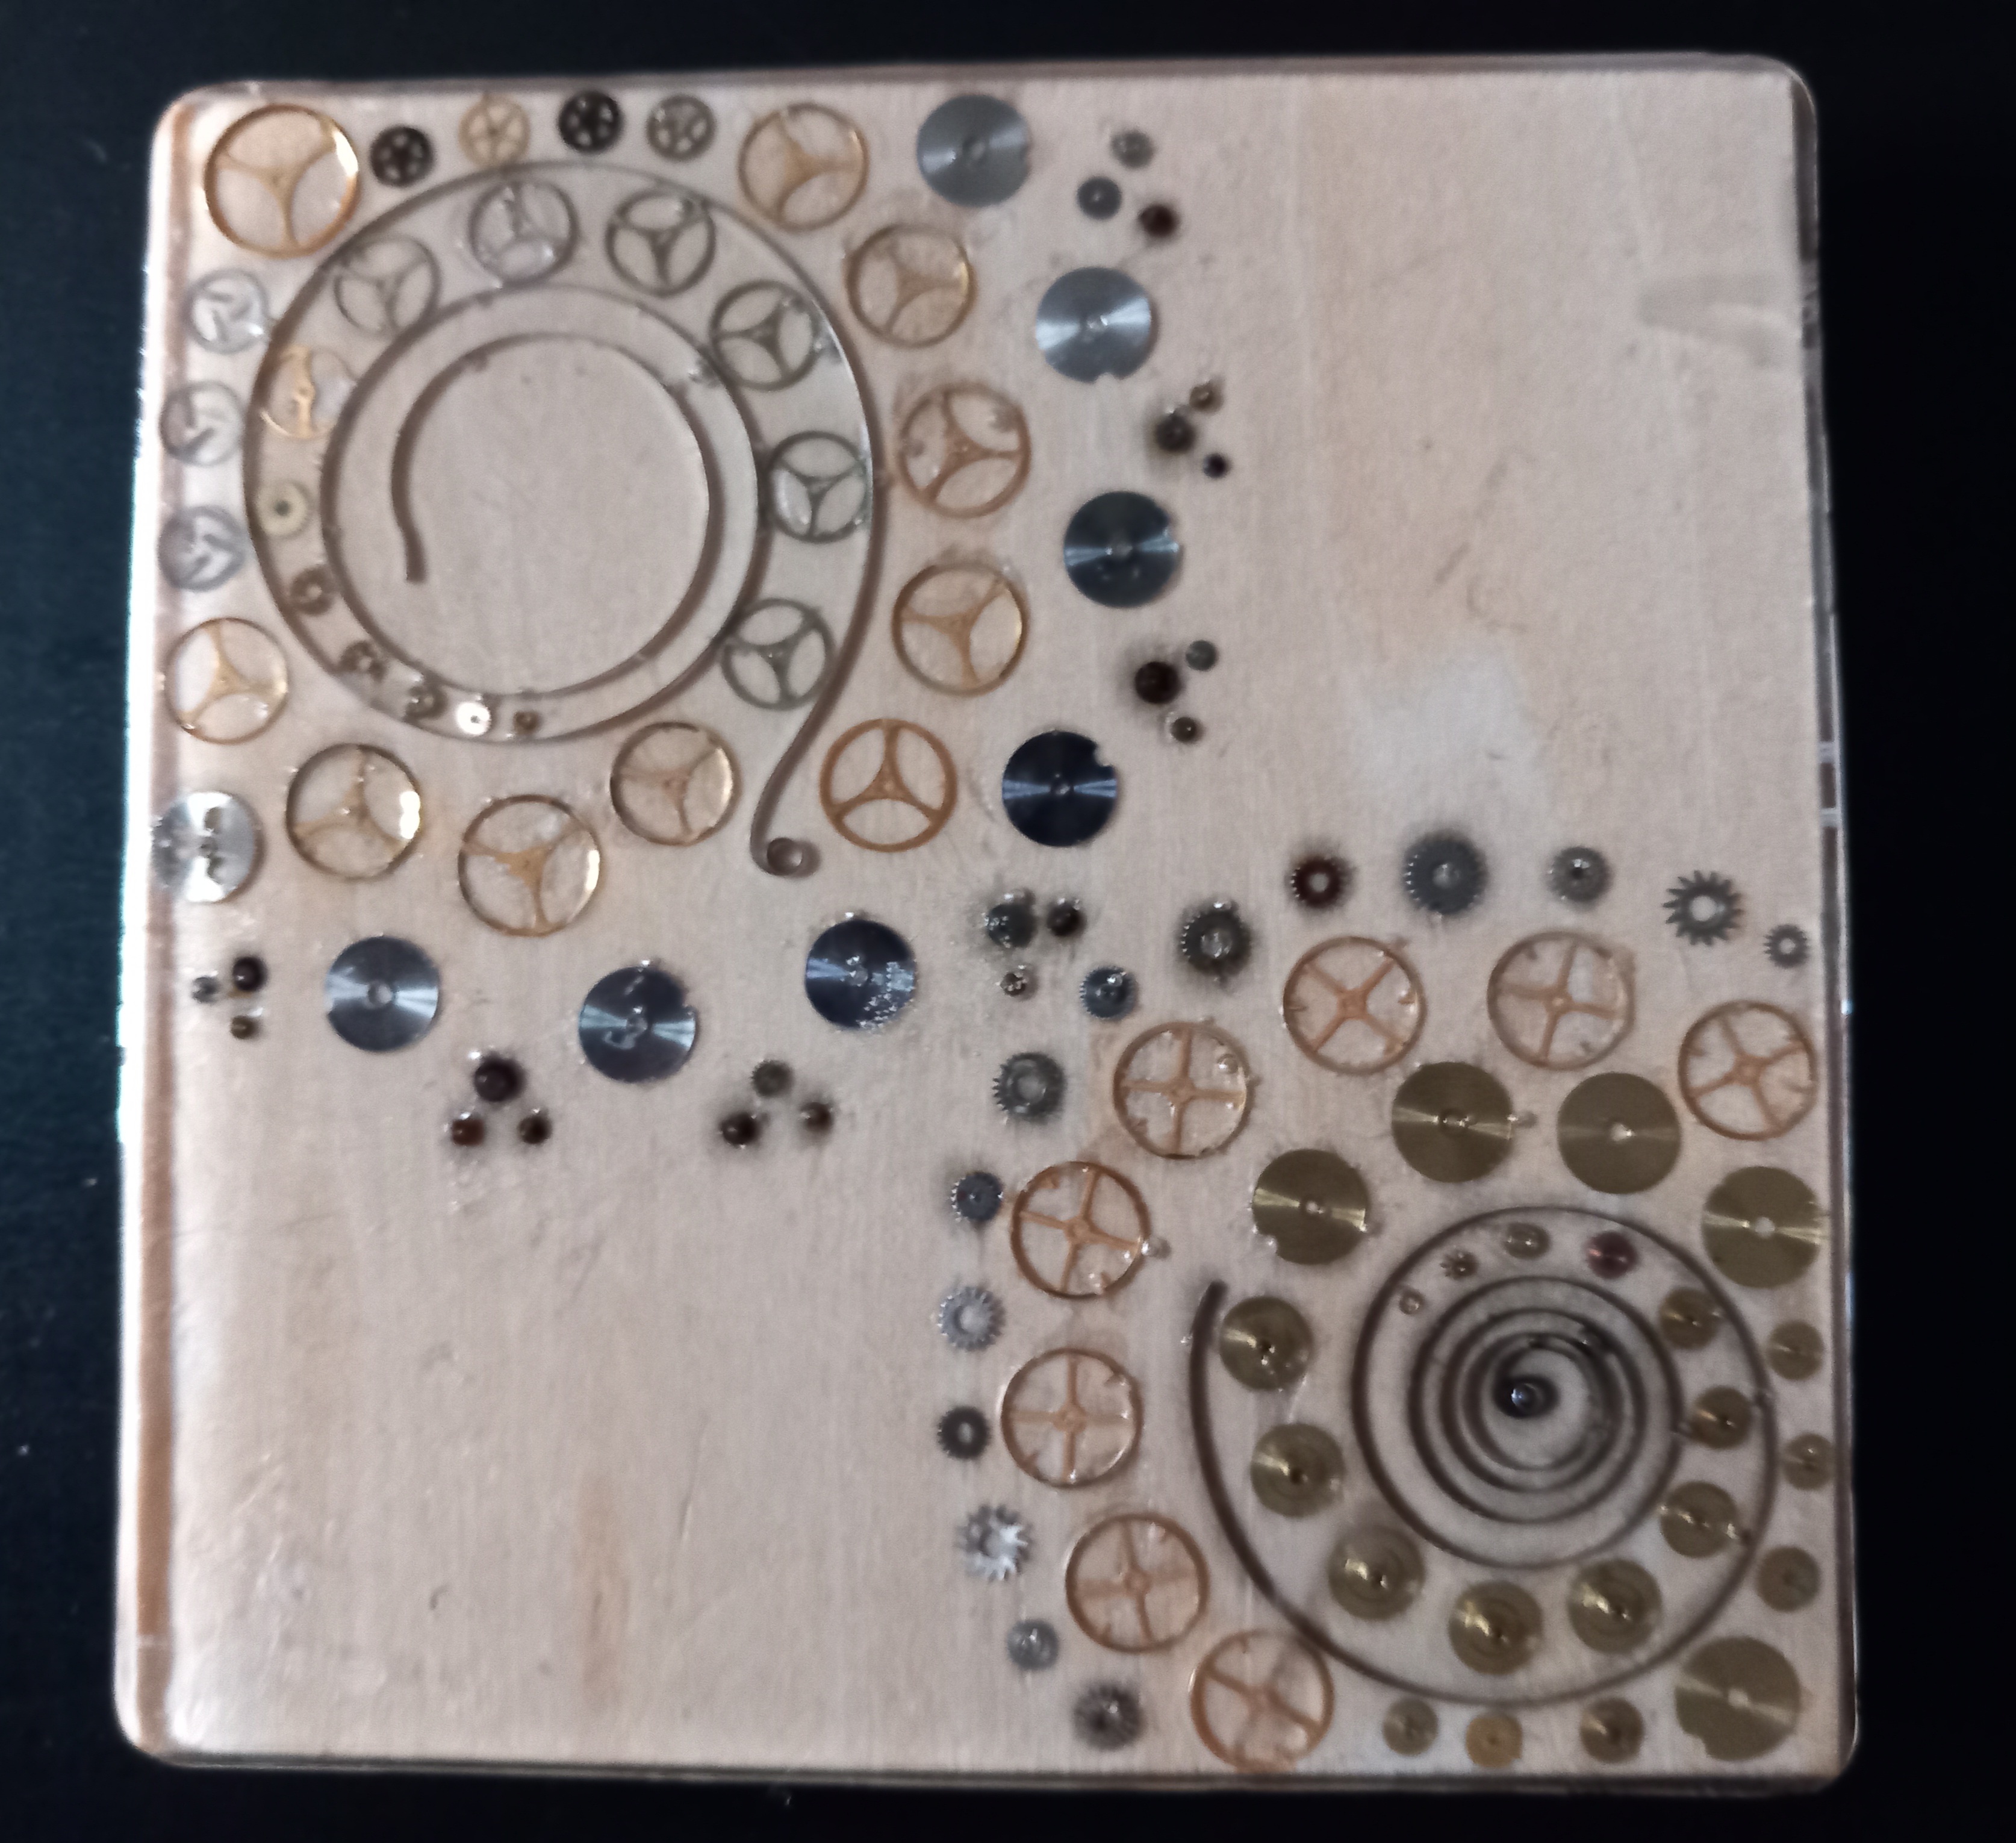
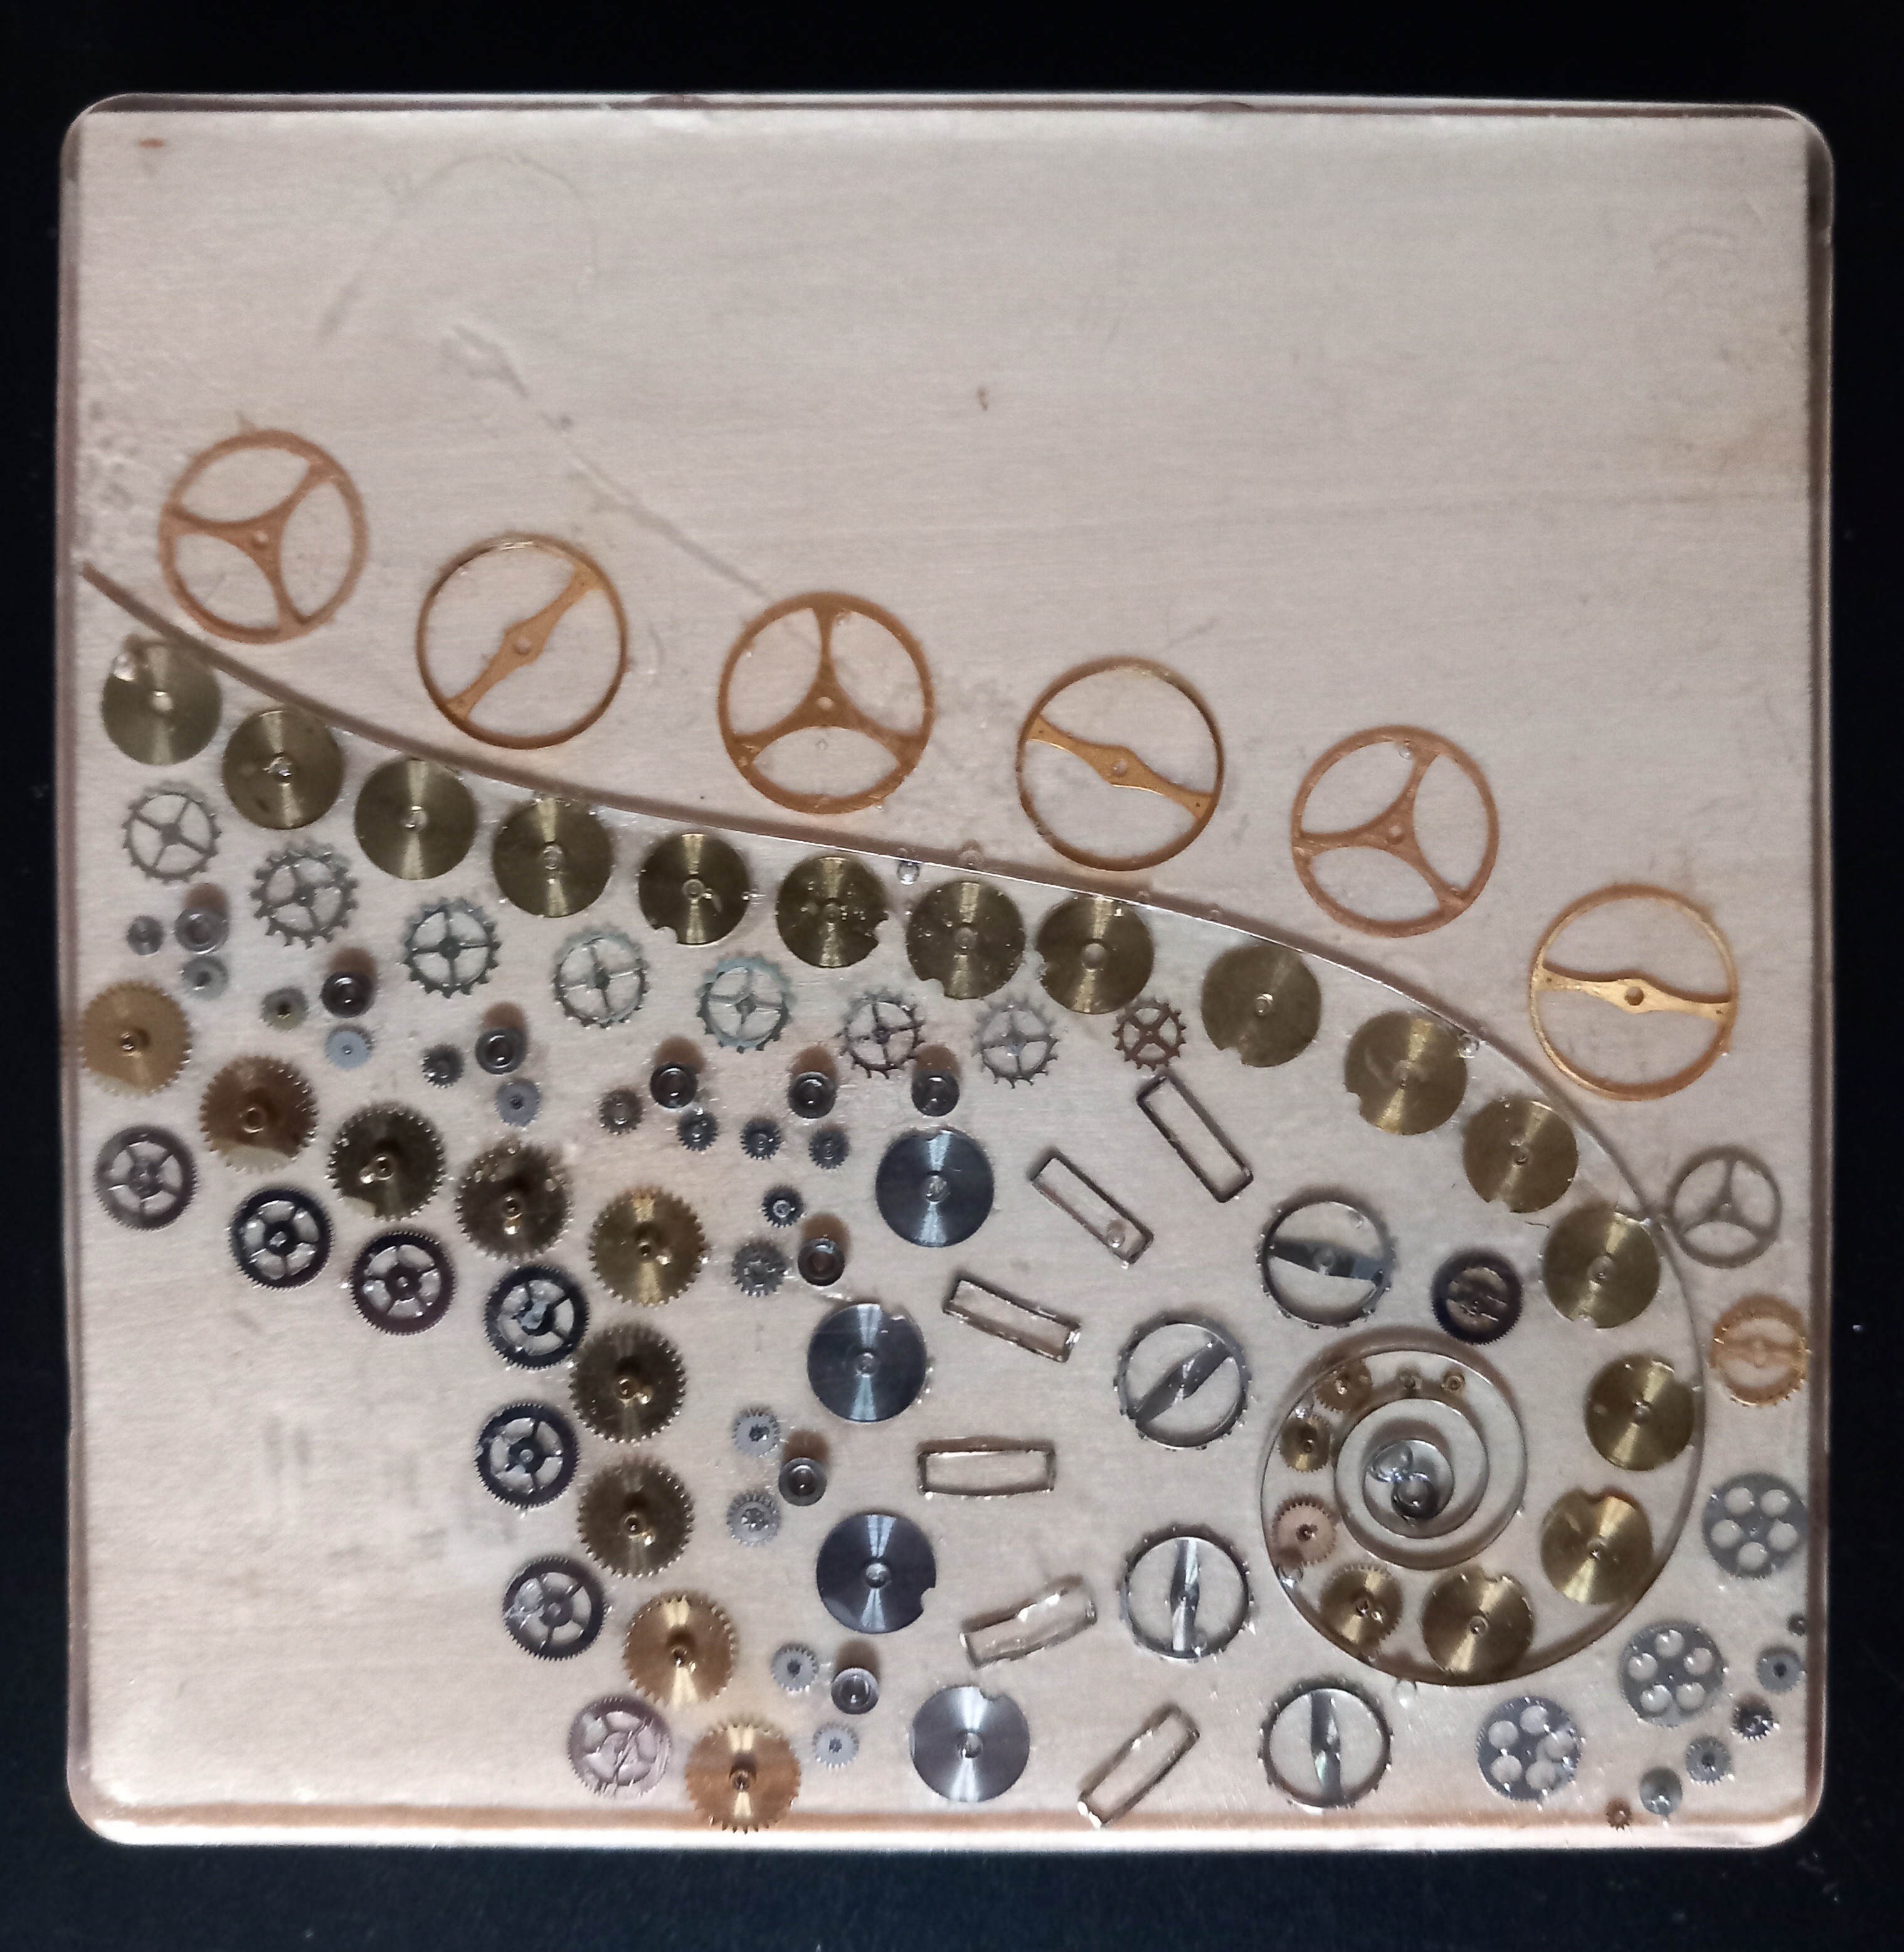
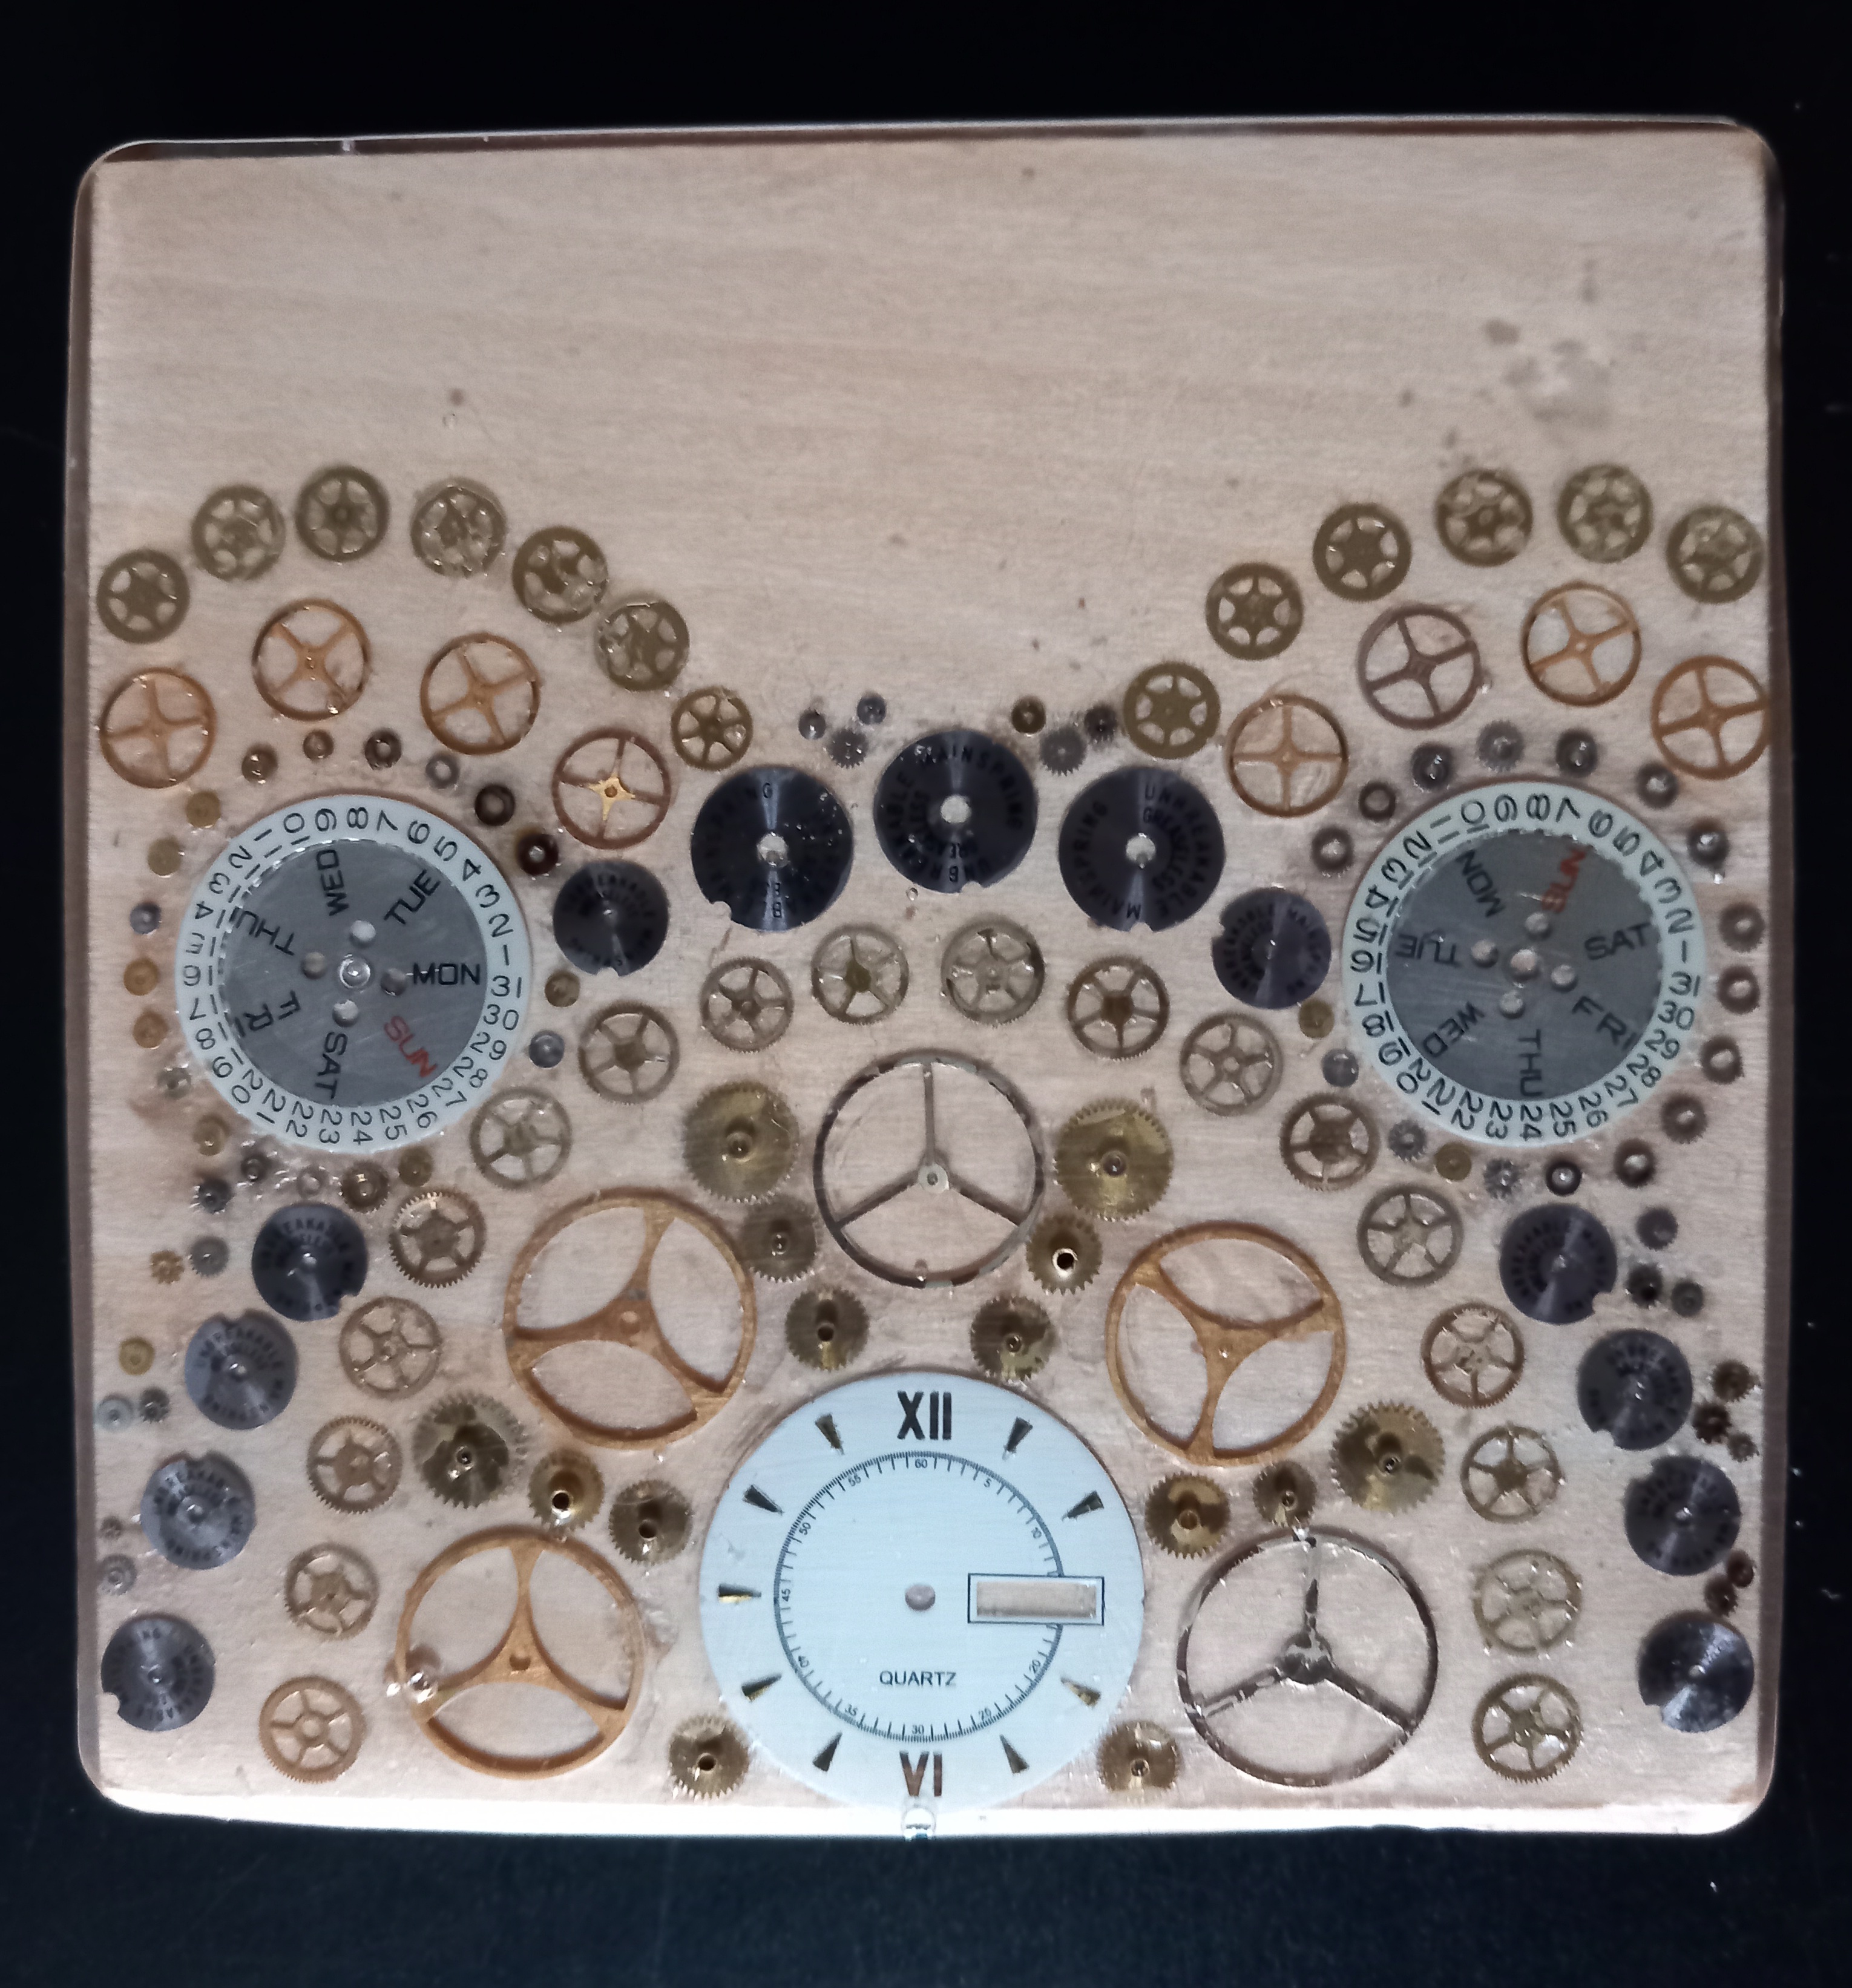
I brushed a thin layer of PVA glue over a wooden square, then used the tips of my fingernails to lift and place the watch parts in a pleasing way. Sometimes the patterns were built around an existing shape – maybe an unwound mainspring, or a watch face. Others were based on concentric circles, either centred or overlapping. I tried to leave enough clear space in them, too, though in a couple of cases kept on going right to the last square millimetre!
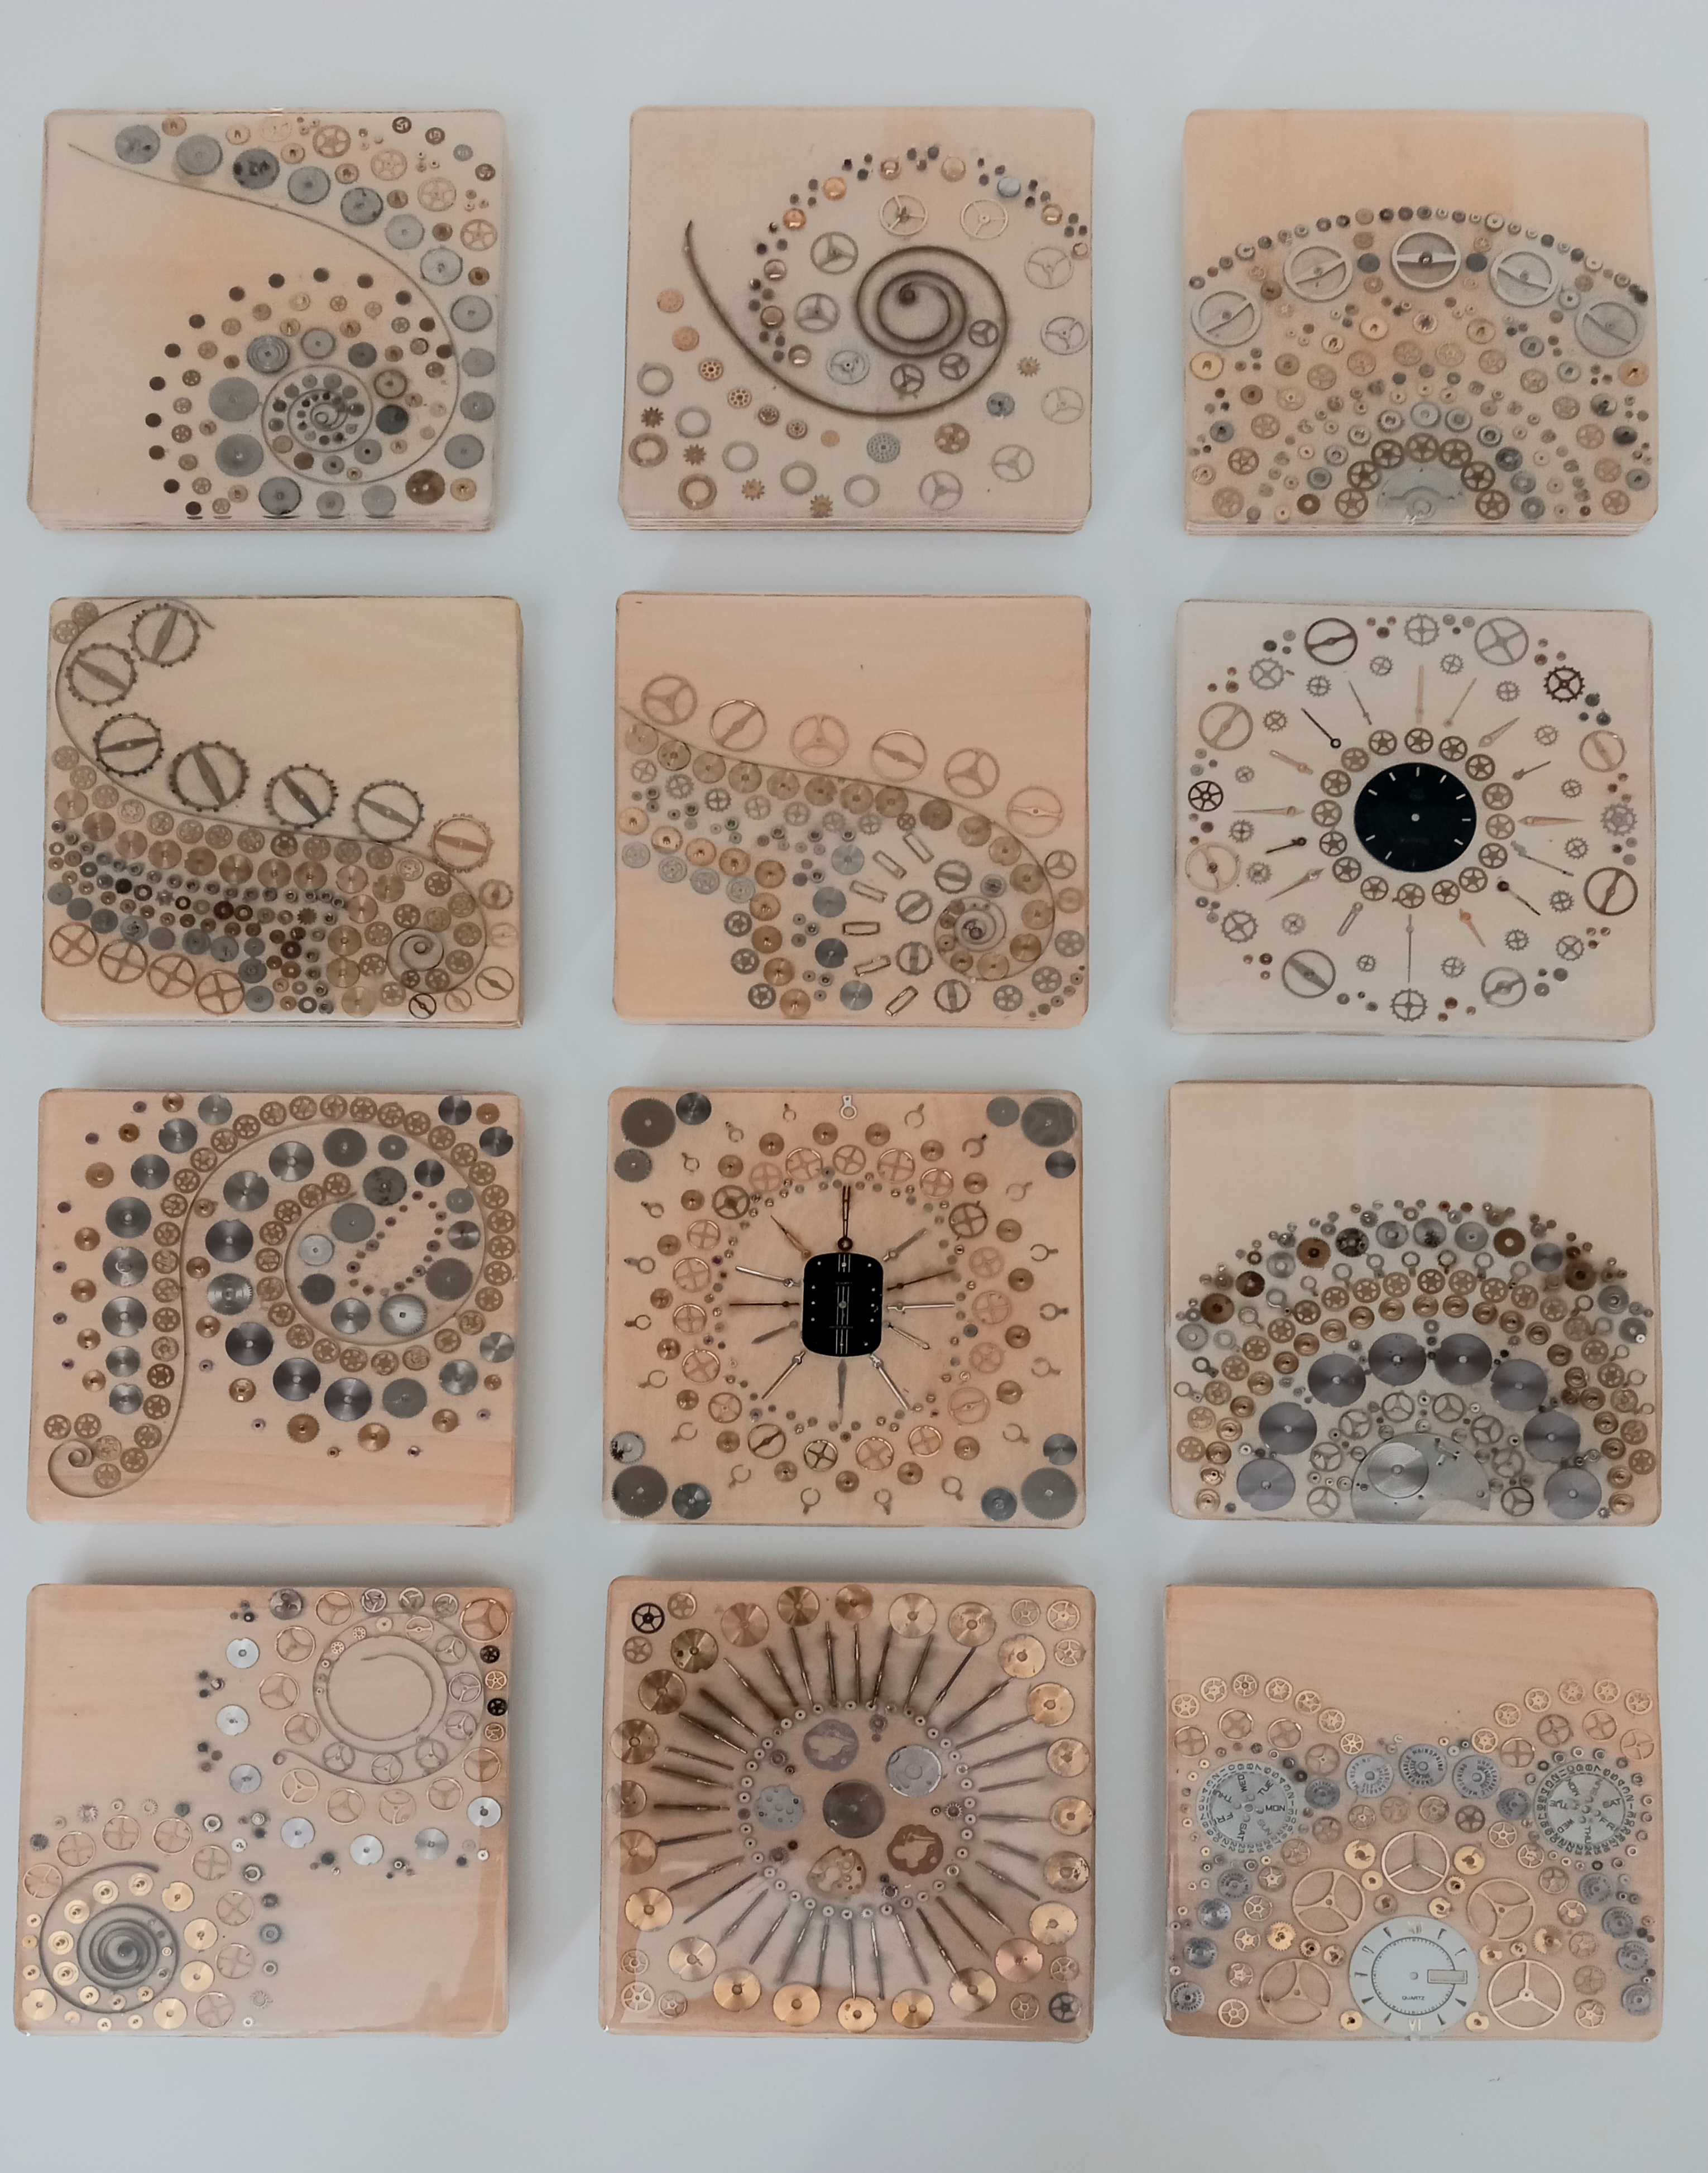
Once all the pieces were glued on, and the glue had dried, I poured resin over the top – the plywood fits right inside the moulds I bought. I learned from my first experiment and didn’t pour it all in the centre – there’s a visible swirl of bubbles in one of them that I was a little sad about.
I started out by making four, and was commissioned to make another set of eight soon after. Here are closer shots of some of my favourites.
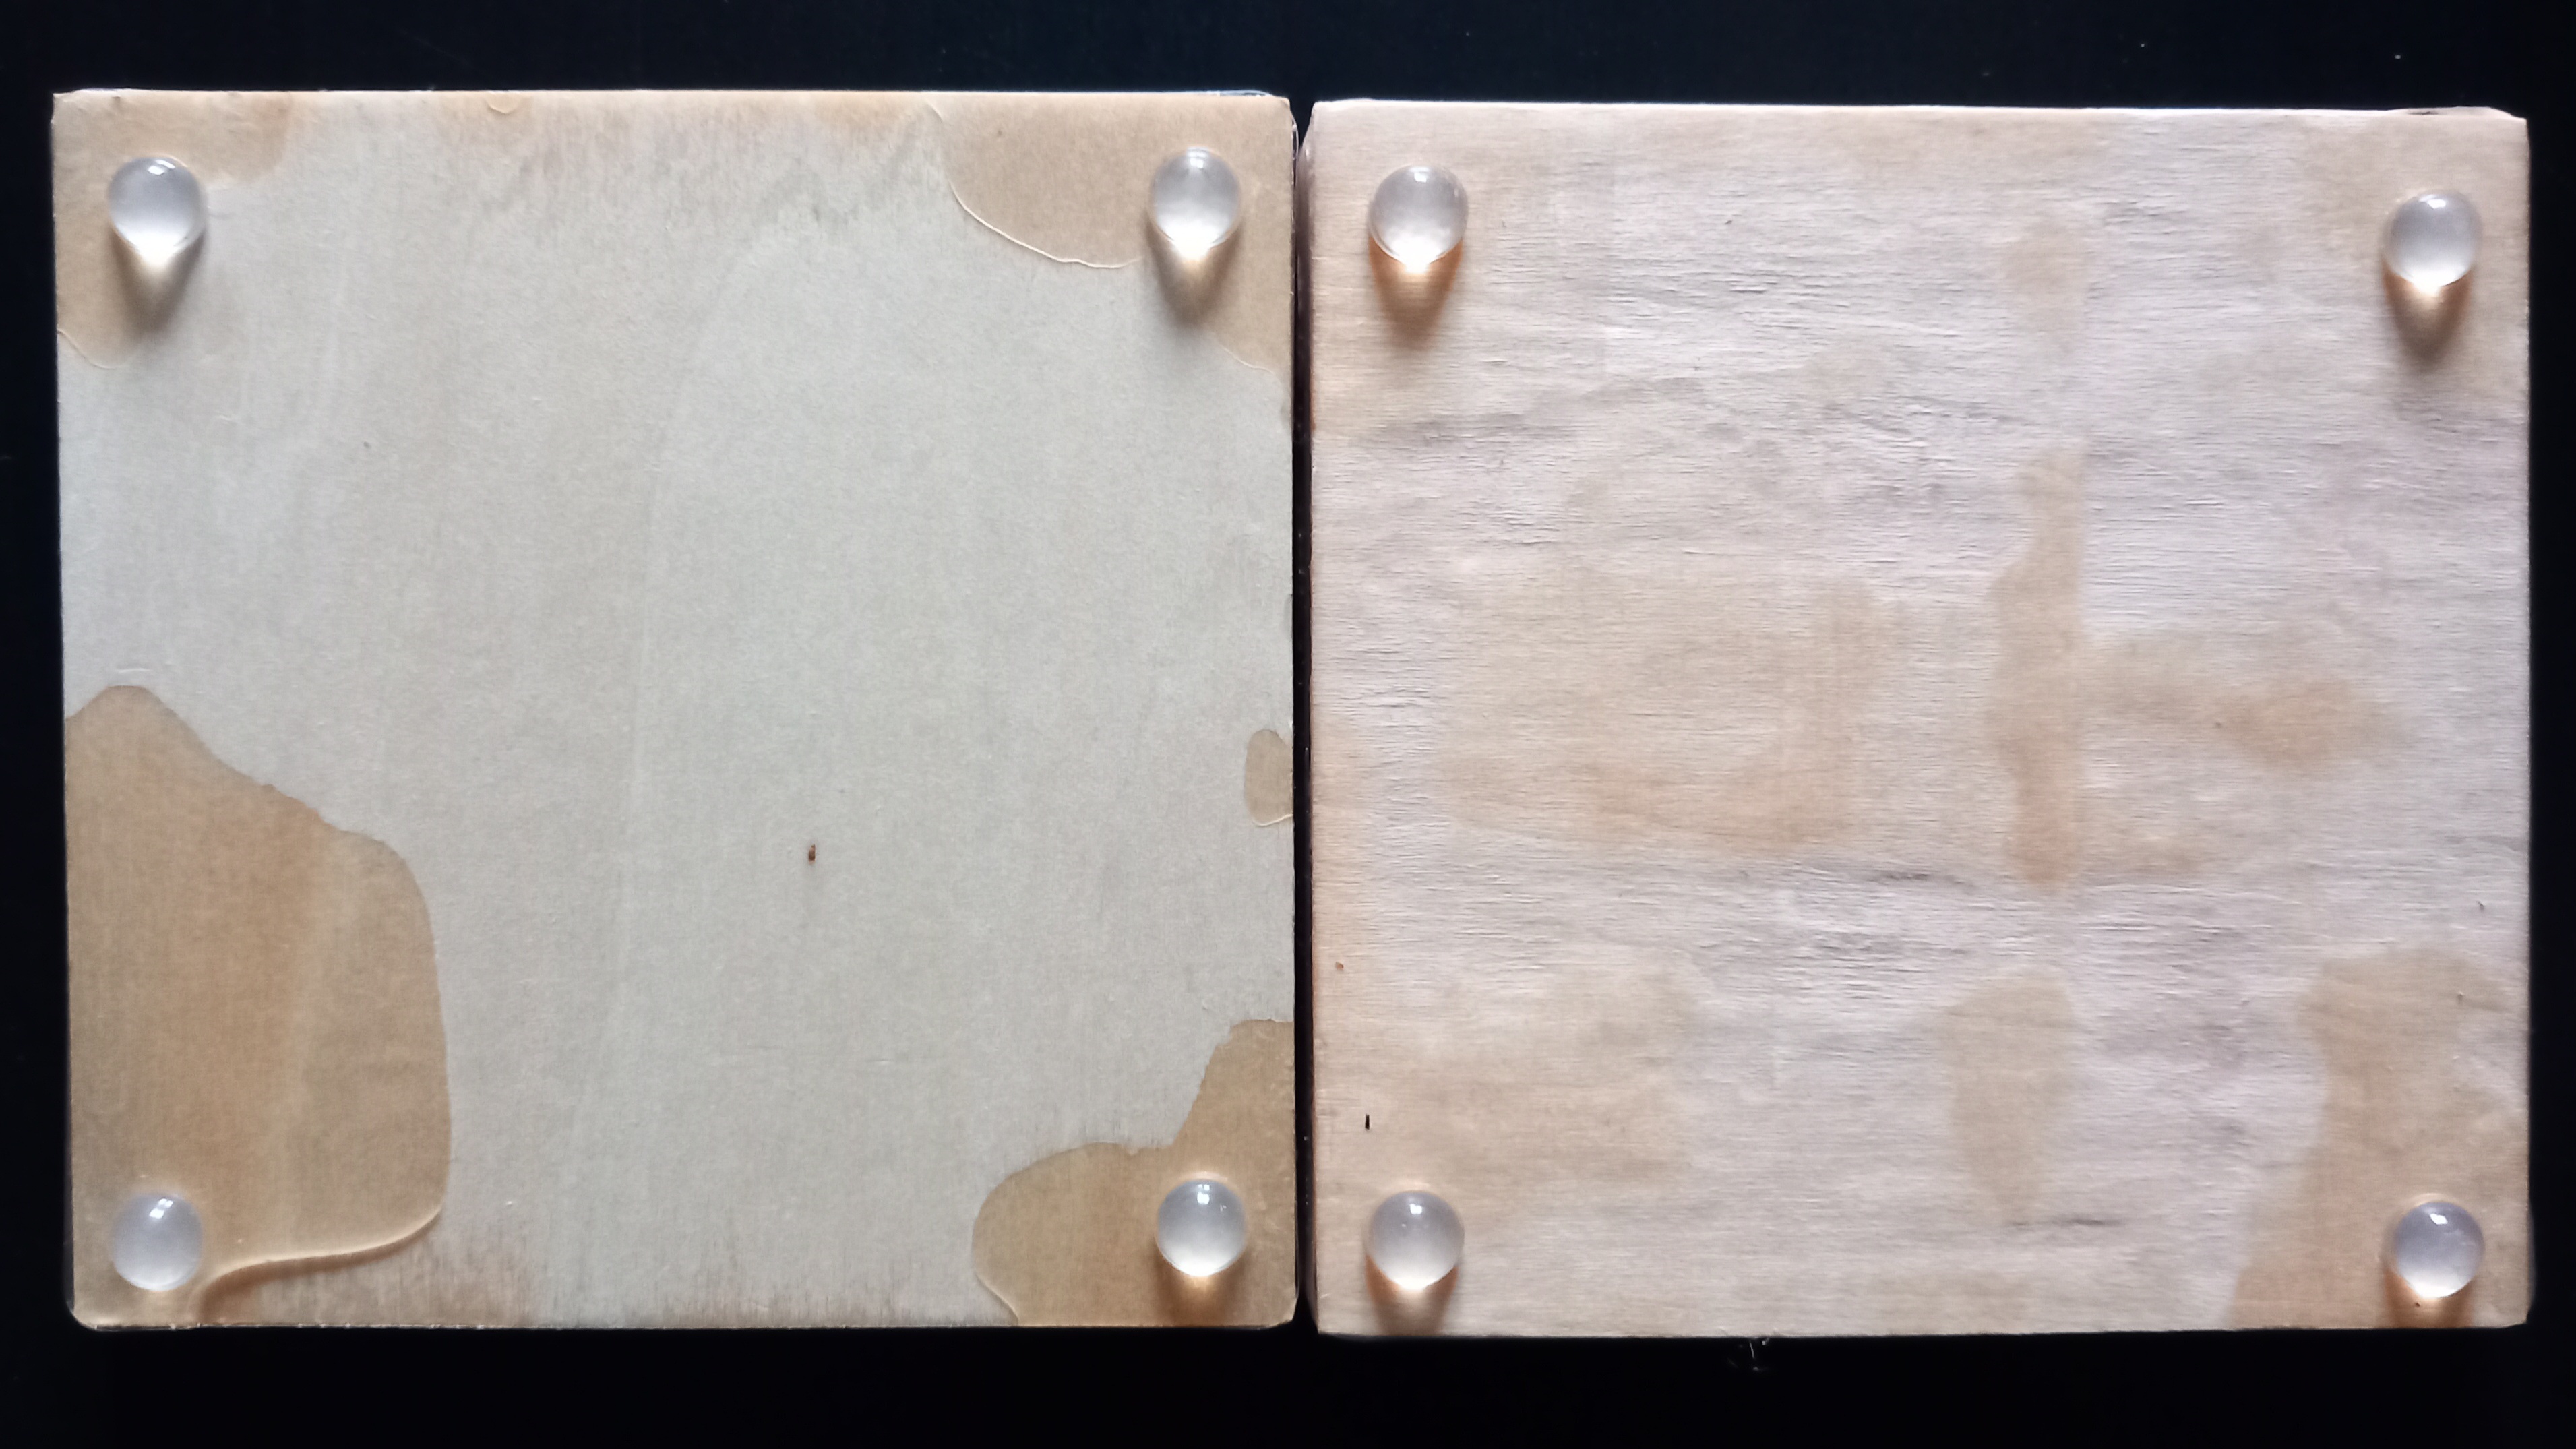
To finish them off, I attached sticky dots to the corners. I did try a thin layer of resin brushed over the back of a few, but it came out so patchy that I ended up sanding it all back off. Neither way is perfect, as the resin does seep under the wood panel. But the amount of dust that sanding the resin caused is very much to be avoided if possible. Nobody’s looking at the back, anyway, right?